How to Connect Monday Website to QR Code Zap

If you are having a trouble connecting Monday.com website to your QR code Zap, then this article will be your guide.
As we modernize our way of getting things done in an organized and automated way, using project management and automation tools has become a necessary tool for businesses that deal with a hundred or more customers per day.
Because of that, complicated technology connections in the past were replaced by easy access technology such as API configurations and made people’s lives simpler.
With Monday.com and Zapier integrations as one of the tools that benefit the use of API integrations, its use for most businesses is a must.
What is a QR code Zap?

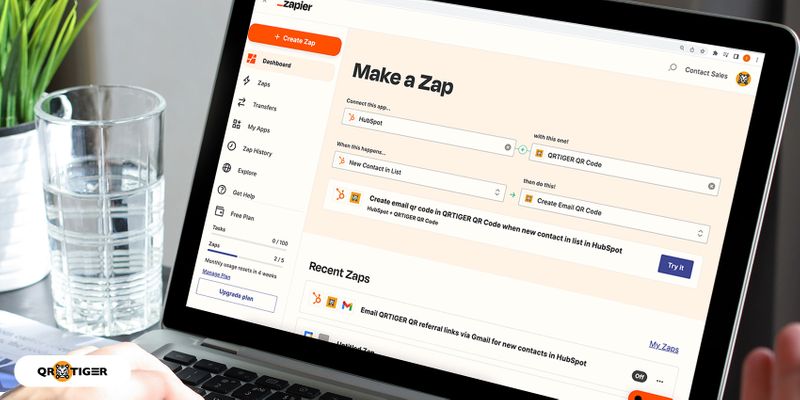
A QR code zap, also known as Zapier QR code workflow, is an automated workflow that connects various apps and services to a QR code maker.
In making a QR code zap, you must choose a QR code generator that allows app integrations with Zapier, like QR TIGER.
In a world where interconnection becomes the simplest solution for software compatibilities, QR code and Zapier integrations become the app interconnections that most businesses use today.
Things you need when doing an app connection
As simple as app connections can be for normal users, connecting apps for business is a different story.
Because of that, you will need to prepare the following things to create a seamless connection between two different apps.
Account
When integrating two different apps for business, you need to have an account for each of those services.
As you will need to make a connection between two different apps, having an account for each of them is needed to avoid any connection errors.
API Key or Tokens
As the technology innovators’ goal is to provide an easy and seamless solution to its target users, API Keys between apps or software are established.
In making a connection from Monday.com to Zapier QR code integrations, it is important to secure your QR code maker and Monday.com account API.
Without them, both software will not allow you to make a connection from Monday.com to your QR code Zap.
Related: QR Code API for your CRM
How to connect Monday.com to your QR code Zap?

Now that you have secured your QR code maker and Monday.com account, you can start creating a connection from Monday.com to your QR code zap.
In creating one, here are the following steps that you must follow.
1. Open Zapier and Log your account in
To start connecting Monday.com to your QR code Zap, you must first open Zapier’s website and log your account.
There are three ways how to create a Zapier account, you can use your Gmail, Facebook, or Microsoft account to log in to Zapier.
Once you have successfully logged your account in, directly go to your dashboard.
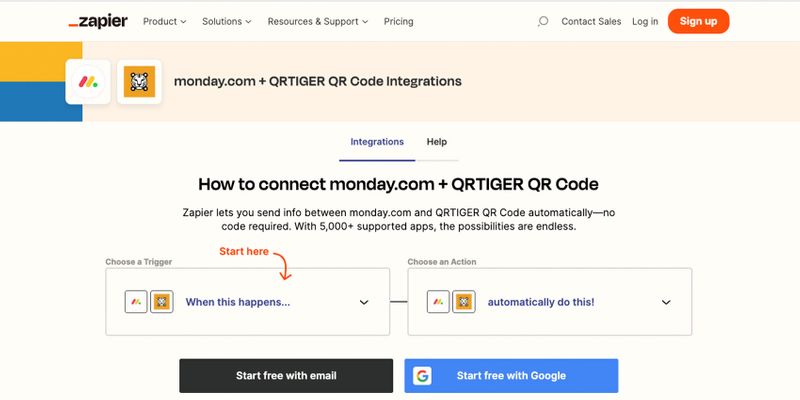
2. Start creating your workflow by inputting Monday.com in the first blank and the QR TIGER QR code app in the second.
3. Select the trigger you want to send to Zapier’s QR code Integration
Once you have entered the apps you want to connect with, select the trigger you want to send to Zapier’s QR code integration.
Monday.com has 8 different triggers that you can use to connect to your QR code zap. And these triggers are Column Value Changed in the Board, New Board, New Item, New Update, New User, New Item in the Board, New Update in the Board, and Specific Column Value Changed in the Board.
Column Value Changed in the Board – the trigger takes place in any column of the board you choose to get triggers with.
New Board – the trigger takes place if you create a new board in any of the projects you have in existence.
The New Item – trigger takes place when you create a new item across the projects you have.
New User – the trigger takes place when you add a new user to your project.
New Update – the trigger takes place when you update any information in the projects you currently handle on Monday.com.
The New Item in the Board – the trigger activates when you place a new item in the board you select to receive notifications with.
New Update in the Board – trigger activates when you place new updates in the items or columns in the board you specifically selected.
Specific Column Changed in the Board – a trigger that activates the workflow when you make changes with the specific column you choose in the board you select e.g. Location Column or Person Assigned Column.
4. Select the action you want to happen in Zapier’s QR code integration.
After you have selected the trigger you want to use, proceed to select the action you want to do when the trigger happens.
The actions Zapier’s QR code integration has for any triggers are creating a dynamic QR code, creating a static QR code, and creating a vCard QR code.
Related: Zapier Integration: How to Embed Employee Data on a Vcard QR Code Using Zapier
5. Click the 'Try' icon
As you have set the trigger and actions in your Monday.com and QR code Zap, click the try it icon and continue editing your workflow.
Trigger section:
Once Zapier redirects you to the Zap editing phase, continue editing the trigger section with the following steps.
1. Click the Choose App & Event dropdown and check if the event you choose is displayed correctly.
2. Connect your Monday.com account by inputting your Monday.com API Token
To successfully connect your Monday.com account to your Zap, obtain your Monday.com API Token.
In retrieving your Monday.com API Token, Open Monday.com and log your account in.
After you successfully log your account, click your profile to open other Monday.com options.
Next, select the developers’ section in the Account column. Once you open the developers’ section, click the developer menu and choose My Access Tokens.
Copy your API Token and go back to your Zapier workflow.
Click the Choose Account dropdown and add your Monday.com account by selecting the Add Account button.
A new window pops up and will request you to place your API Token. Paste your copied API Token, and your account will automatically appear.
3. Test your trigger
Once you have successfully connected your Monday.com account to Zapier, you can proceed with testing your trigger by selecting the test trigger dropdown and testing the trigger.
If Zapier finds the latest update or addition you made for the specific trigger, it will display the data you made from Monday.com.
Action Section:
After you find no errors in the trigger section, continue making configurations with the Action section.
1. Review the action/event you chose in step 1 of the trigger section.
2. Connect your QR TIGER account to complete the action.
To make your Monday.com to QR code Zap connection work, connect your QR TIGER account to complete the action.
In connecting your QR TIGER account, click the Choose Account dropdown and click the Add Account button. A new window will pop up and provide you with instructions on how to get your API Key.
Aside from the API Key, the QR code integration also requires you to provide the email you use in subscribing to QR TIGER.
Related: How to use a QR code generator API?
3. Setup action
After connecting your QR TIGER account to Zapier, proceed to set up the action you have chosen and select the information you want to turn into a QR code with.
If the action you choose is to create a dynamic QR code, then the following setup should be fulfilled.
If you choose to create a static QR code, then the following setup should be filled.
4. Do a test trigger.
Now that you have successfully linked your QR TIGER account to your workflow zap, you can proceed in testing out the workflow trigger and action.
In this way, you can ensure that the QR code displays the right information.
5. Add an action with your Gmail to get notified of the triggers you create on Monday.com
To download the QR code you created with Monday.com, add an action step with Gmail and add your email as the sender of the message.
Once you add the action step, select the event or action you want to happen. There are 6 Gmail actions that you can choose from. And these actions are Send Email, Create Draft, Create Label, Add Label To Email, and Reply to Email.
6. Setup your action
After you have successfully added your Gmail as the sender of the message, continue composing a pre-filled email in the setup action dropdown.
In setting up your pre-filled email, there are 11 subsections that you need to fill up. And these subsections are the To, Cc, Bcc, From, From Name, Reply-To, Subject, Body Type, Body, Signature, Label/Mailbox, and Attachments.
As you will have to test your actions, please place the email that you personally use in the To subsection.
You can change your data in the To subsection after you are satisfied with your actions.
7. Run a trigger test
Once you have filled all the required fields in creating pre-filled data, continue running a trigger test to ensure the right information is displayed.
After you are satisfied with your trigger test, you can proceed in changing the recipients in the To subsection into the email of your members or workmates.
8. Turn your Zap on
If all the steps show a check icon at the left side of its corresponding icons, you can proceed to turn your Zap on and let your Monday.com members be notified with a QR code containing the tasks they will be given for the duration of your project.
To easily identify your QR code zap, you can name your QR code zap according to its function.
Start connecting to Monday.com with QR TIGER’s QR code Zapier Integrations
As the hassle of making a connection between apps is eradicated with the use of API software, millions of app connections are made possible.
With the Monday.com and Zapier QR code integrations as one of the products of API integrations, connecting one different software to another is a technological feat that both developers and normal workers enjoy.
To start integrating a QR code generator with your project and automating software, you can always depend on creating a seamless app connection with QR TIGER.
FAQ
Does my QR TIGER API key change over time?
Once you have successfully signed up for a paid subscription plan for QR TIGER, the API key you find in the account setting is your permanent API key for any app integrations.
What should I do if my Monday.com API Key doesn’t work?
If your API Token in Monday.com doesn’t work, you can always regenerate your API token and copy and paste it back to the software you want to connect Monday.com with.

.gif)


